Wisycom
How to mic a trumpet and trombone
Guidelines for miking the trumpet and the trombone
The trumpet can generate sound with very high levels and also compresses and accelerates the speed of sound. Not only is the average (rms) level high but also the so-called crest factor (the ratio between peak levels and rms levels) can exceed 20 dB. These peak-levels are – depending how the instrument is played – in excess of 140 dB!
It is difficult to understand why we see large diaphragm microphones used so often for this application. It is much more logical to choose a microphone that can handle these high levels comfortably, i.e. with enough headroom. Unless you do not wish to capture the natural sound of the instrument.
When a microphone is driven to its limit, the sound quality is affected and one can clearly hear when the mic "hits the ceiling". At this point, this "smear" sound is what most engineers and producers think a trumpet or trombone sounds like. Most of this is driven by the player claiming that their sound needs to be "warmer". We've got news for them: a trumpet on its own is anything but warm.
The players' entire reference is from hearing their trumpet sound from the wrong side of the instrument, the back side. When you sit in the audience the trumpet is a thrillingly bright and piercing instrument capable of exciting accents and, if played properly, "warmth". However, you may try to mic the trumpet from the close proximity back side of the bell. Many high profile trumpeters have been surprised by this technique. This will eliminate the strong directivity and "warm" up the sound without "smear". Also in an overdub; if the recording room is large enough try to mic the trumpet or trombone from 3 m away, this also smoothes out and creates "fatness".
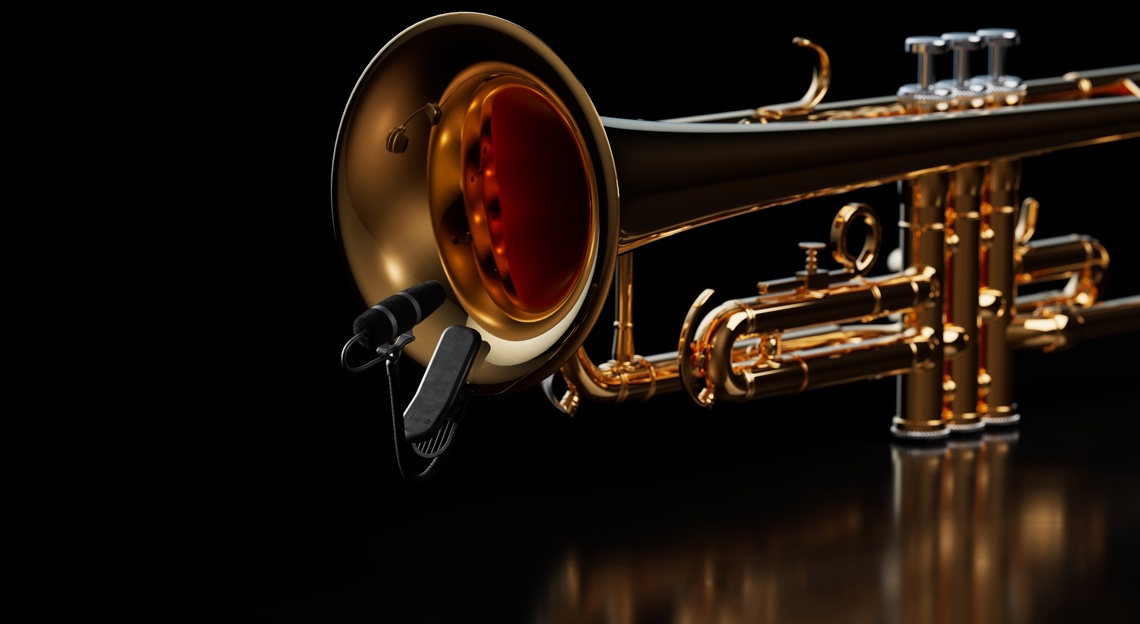
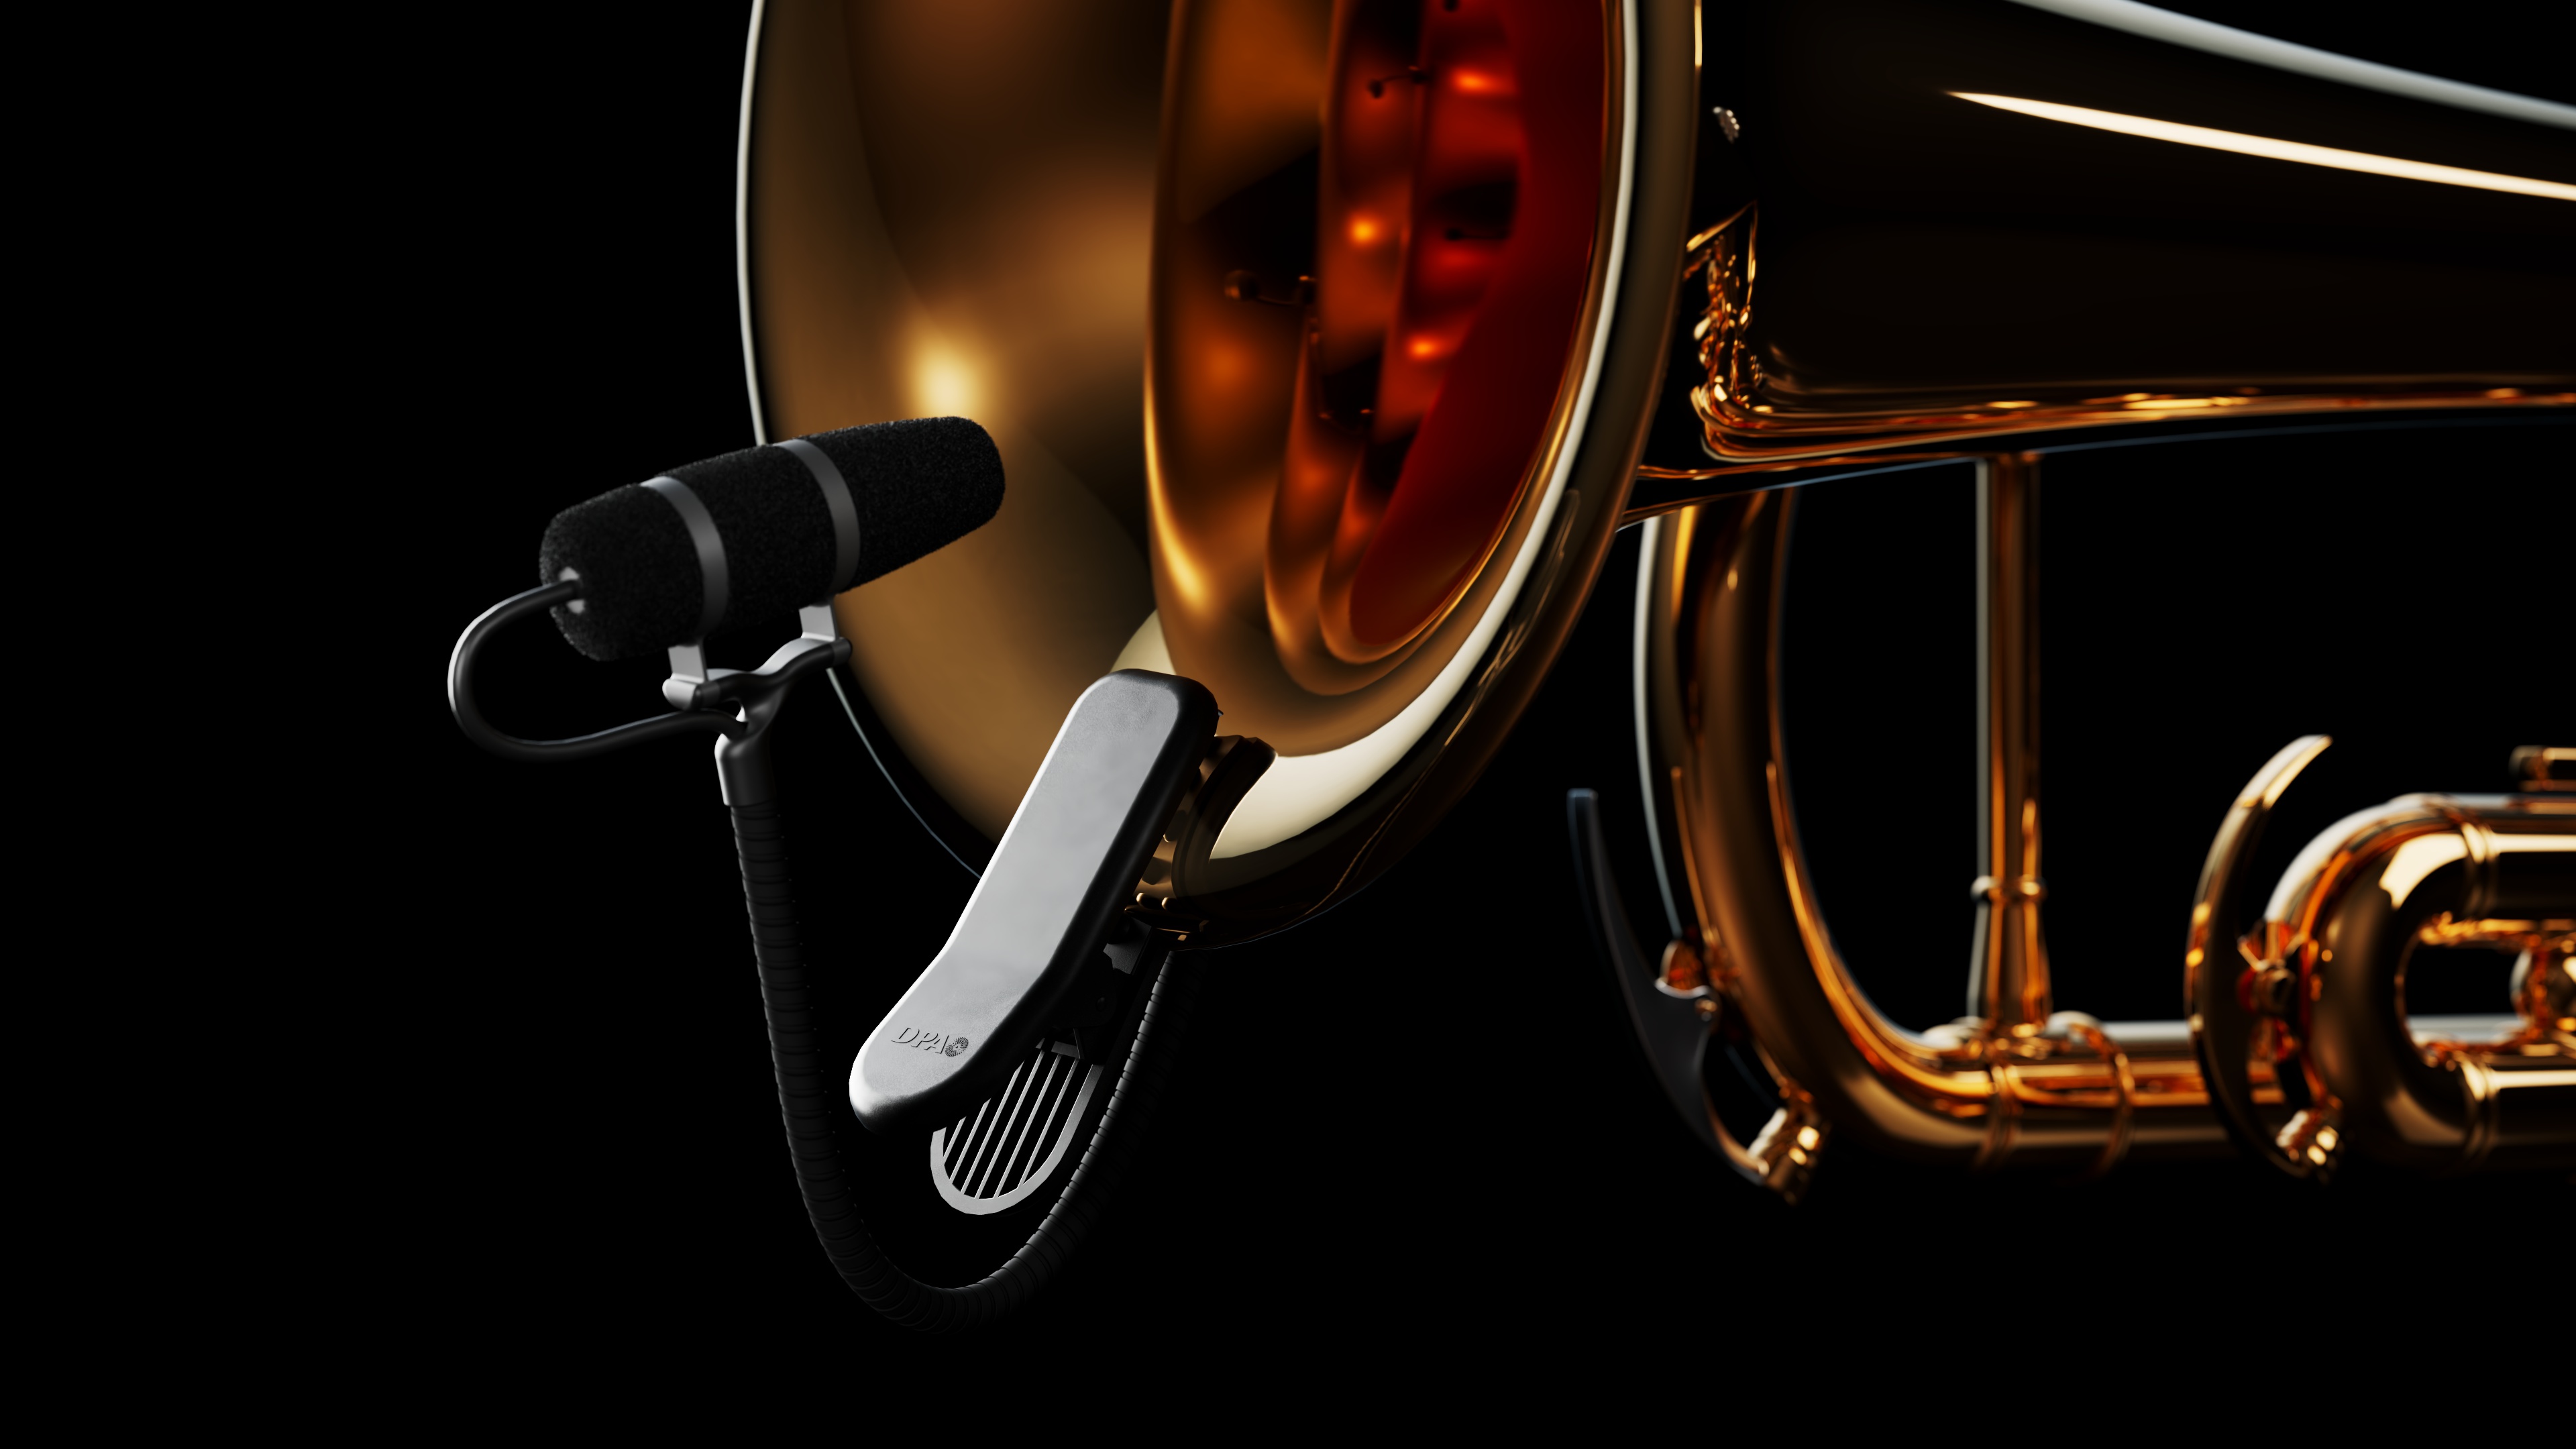
The 4011A Cardioid Microphone and 4011C Compact Cardioid Microphone are perfect for the close miking application. They can handle very high sound pressure levels with ease, whether the mic position might be close up front, distant, or close to the side or rear. Again, experimentation will teach you much about these instruments if only you try. The compact versions can easily be mounted on a microphone stand. If the sound is too bright, try not to position the mic in the center of the bell.
The straight on microphone placement is rather critical. For a well balanced sound, position the microphone 30 to 50 cm from the bell, slightly off axis. Aimed straight into the bell it will give a brighter sound and pick up the accelerated sound stream. Most producers think this is ugly. To "warm" up the sound, point the brilliance peak on the microphone down or to the side. This can be up to 45º and remember that you cannot do this with most other microphones than DPA's without phasing or coloration.
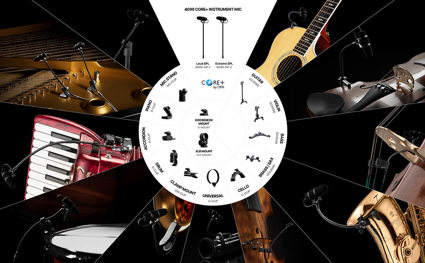
For instrument mounted solutions and live use the 4062 Omnidirectional Miniature Microphone or 4099 CORE+ Instrument Microphone for Brass are our best bets. Both can handle very high SPL’s (154/152dB). But whereas the omni will give you the most natural sound at low levels of amplification, the 4099 will give you much more isolation and a higher gain before feedback.